Entrée, Side, Gluten Free, Spring, Summer

LEMON KALE SALAD + SEARED SALMON

People who care about food, have a philosophy about what they eat and why they eat it. Some are vegetarians for animal reasons, or vegan because of health purposes, you may not eat gluten because of an allergy, or some stay away from it as part of an anti-inflammatory diet. No red meat, no foods with a face, just fish... there are so many ways you could qualify your eating habits. While eating a gigantic bowl of this salad, I was reminded of why I try to eat well as often as possible. You feel so much better. I don't want to get into a discussion of the right and wrong of what to eat, because I don't feel it's a black and white issue. You have to respect yourself and those you're feeding, and believe that what you are putting inside, does matter, and then make your own decisions. All I can say is that for myself, I find a big bowl of raw kale salad, a subtle reminder of how good it feels to put healthy things in our bodies.

I know it's a bit early in the season to be singing the praises of kale, but this salad is my current obsession. If you are familiar with this hearty green, the thought of eating it raw sounds a bit daunting. It is tough, and somewhat bitter. I don't often cook with it because it tastes so earthy, and now I am eating it raw, by the bowlful. You toss it with this light tangy dressing, while it's speckled with bits of grainy bread crumbs and salty parmesan and it's amazing how something so simple and good for you, can taste this great too. The salmon here is not meant to have any strong flavors, as the kale salad adds enough zip for both components. You could easily serve the salad with some roasted chicken, marinated tofu or with the ever-so-versatile poached egg as well.

LEMON KALE SALAD + SEARED SALMON // Serves 2

The kale salad recipe is adapted from Dr. Weil/True Food Kitchen. Make a little extra if you like leftovers, the kale stands up to the dressing really well, so you can keep it lightly dressed in the fridge and it only gets better. This will likely make more dressing than you need, but better to be prepared.

4 Cups Kale (lacinato or cavolo nero best), rinsed and dried

1/3 Cup Fresh, Whole Grain Breadcrumbs

1/3-1/2 Cup Fresh Grated Parmesan or Pecorino Cheese

Red Pepper Flakes to taste

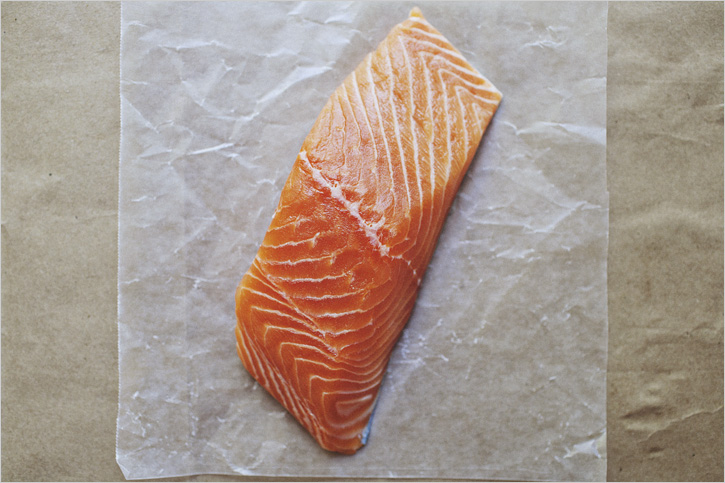
2 (5 oz.) Pieces Wild/Sustainably Raised Salmon Filets

1 Tbsp. Dried Basil

1 tsp. Garlic Salt

Ground Pepper

1/2 Cup White Wine

// Dressing //

1/3 Cup Extra Virgin Olive Oil

1/3 Cup Fresh Lemon Juice

2 Cloves Garlic
Pinch of Salt/Ground Pepper

1. Remove the ribs from the kale, lay leaves on top of each other, and slices into 1/4'' ribbons. Put them all in a bowl.

2. For the dressing, combine the olive oil, lemon juice, garlic cloves and pinch of salt, pepper and red pepper in a blender/food processor and blend to combine. Taste for spice and lemon to olive oil ratio, I find that this is a personal preference. You can also add a touch of honey to mellow out the tang if need be. Pour desired amount over the kale and toss so the leaves marinate in the dressing while you finish the salmon.

3. Dry both sides of the salmon, and gently rub on the garlic salt, pepper and dried basil. Heat a sauce pan over medium heat with a bit of oil to avoid sticking, add the salmon filets, and allow them to get crispy on one side, about 5 minutes. Flip the filets, sear for a minute, and add the 1/2 cup of wine to the pan. Cover and cook until just cooked through. This will likely take another 5 minutes, but will vary depending on thickness of your filet. Use your judgement and watch the center of the fish. Remove.
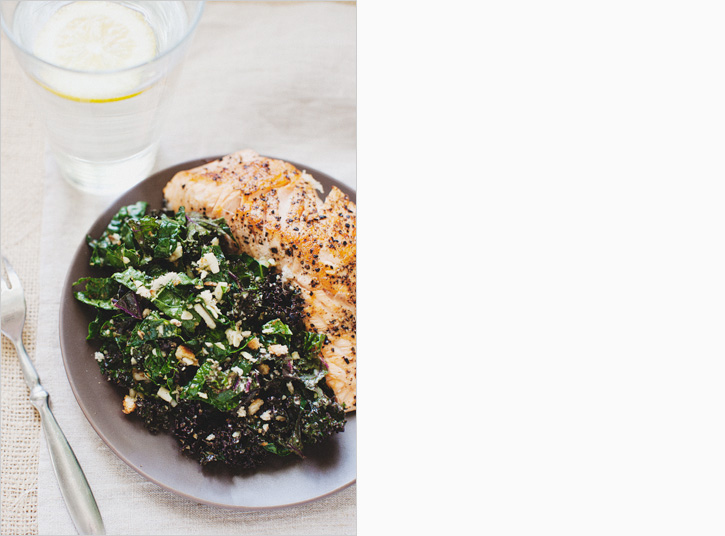
4. Add the breadcrumbs, grated parmesan, a bit more dressing and give the salad another toss to combine. Serve each plate with a hefty portion of kale, and a piece of salmon.
Print This Recipe

Entrée, Breakfast

PICNIC BREAKFAST BURRITOS

I am lucky to live in a place where you really could eat outside most months of the year. We have a special little spot, the grass hill above Salt Creek Beach, that has been our go-to picnic spot for a number of years. It's no secret, families and couples gather on that hill around 5 o'clock with coolers of mismatched tupperware, wine in plastic cups or take out of choice. It's a pretty mild incline, so while eating on a hill may sound bothersome, it's quickly excused when you figure the expansive view of the ocean everyone sees because of it. One of these days we'll post a picture for you, because it truly is one of my favorite spots on earth.

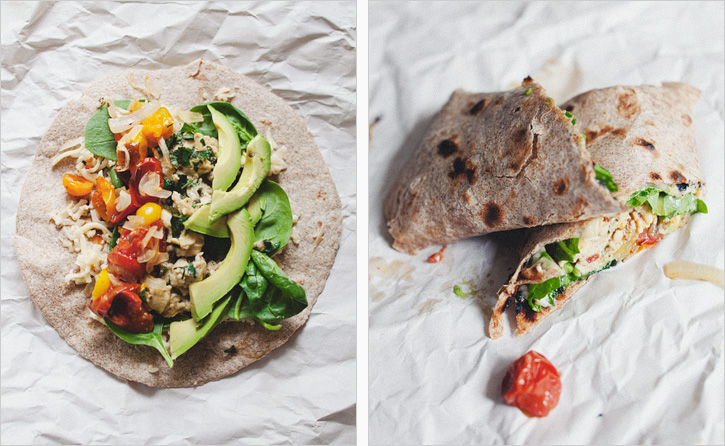
While the people watching at dinner time is entertaining, we recently discovered the joy that is picnicking in the morning. I pick up breakfast burritos, Hugh brings coffee in a thermos, and we watch the quiet waves. It's almost too perfect, oh and I love it. The only caveat is that there aren't too many breakfast foods that travel well. I imagine a frittata would suffice, or maybe even some pancakes if you wrapped them in the right container. However, a breakfast burrito requires no utensils and in the case of the recipe below, you get your grains, protein, and vegetables in one package! If you do decide to make them, whether you're picnicking or not, add or take away fillings as you desire. Change the cheese, add bacon or potatoes if you're feeling authentic. Whether it's your backyard or a short drive to a pretty spot, this is the season to eat outside, go.

PICNIC BREAKFAST BURRITOS // Makes 4

The deal with burritos, is that if you use standard size tortillas, the goods burst out. So after trial and error, we suggest either getting the large tortillas, or using corn tortillas, and making breakfast tacos as an alternative. Alter the amount of filling according to what size tortilla you choose.

10 Eggs

1/4 Cup Whole Milk

1/3 Cup Chopped Cilantro/Basil

Pinch of Sea Salt/Pepper/ Red Pepper flakes

2 Cups Baby Tomatoes

1 Tsp. Olive Oil

3/4 Cup Diced Yellow Onion

Pinch of Sea Salt

2 Cups Baby Spinach

1 Cup Shredded Pepperjack

1 Avocado

4 Large, Whole Grain Tortillas (see note above)

Oven to 350'

1. Halve the baby tomatoes and put them on a rimmed baking tray. Add the diced onion, pinch of salt, olive oil and toss to coat. Roast on the upper rack for 20-25 minutes while you get everything else ready.

2. Crack the eggs into a large mixing bowl, add the milk and generously pinch of salt, red pepper flakes and pepper and whisk well. Whisk until they are a consistent color and all yolks are broken up. Add the eggs into a saucepan over medium heat (you really want almost medium low, as eggs that are cooked a bit slower tend to have a softer texture that flash cooked on high heat. Remember, you have to wait 20 minutes for the tomatoes anyway). Scramble the eggs slowly, when they are a few minutes to done, toss in all of the chopped herbs and turn off the heat, they will continue to cook, I promise.

3. Warm each of your tortillas over the stove to warm through, I like mine to get a few little blisters on each side. Lay them on a cutting board and sprinkle with the cheese. Make a layer of baby spinach, pile a quarter of the eggs, and the roasted tomato/onion mix, down the middle of each tortilla. Layer thin slices of avocado on top. Fold both ends, and roll if using a big burrito tortilla. If using taco size, you'll halve the amount of goodies per tortilla.

Print This Recipe

Dessert, Snack

CHOCOLATE CHIP OATMEAL COOKIES WITH CHERRIES + PECANS

I'm fresh off a girls road trip to Napa, California. We stayed at a wonderful hotel in Calistoga called Solage, rode bikes to local wineries, ate, laughed and participated in a self led water aerobics class. We think we're so funny, the lounging pool folk may attest otherwise. We enjoyed a personal tour and tasting at Kelly Fleming's vineyard, and chatted around her big farmhouse table. I get so inspired when I watch people pursue what they love. It is absolutely gorgeous up there. As a Southern California girl, I am awe struck by the landscape that is a mere 8 hours north.

My kitchen has been quiet the past few days, so we're sharing a recipe we had posted on The Kitchn earlier this week. Tara at Seven Spoons posted a version of this recipe quite a ways back, and her images haven't left my mind since. I knew that when I next committed to make a decadent, buttery, serious business cookie, this would be the one. Her post was about a year ago, which goes to show I don't have the self control to make 'serious business' cookies very often. They certainly met my expectations. After a year of thinking about them, they materialized into the soft centered, slightly crisp exterior I had hoped they'd be.

CHOCOLATE CHIP OATMEAL COOKIES WITH CHERRIES + PECANS// Makes 24 cookies

Adapted from Cooks Illustrated

If you like a salty bite to your sweets, I would suggest giving them a sprinkle of sea salt just before you put them in the oven. Pairs perfectly with cold milk or some vanilla bean ice cream.

1 1/3 cup unbleached all-purpose flour
3/4 tsp baking powder
1/2 tsp baking soda
1/2 tsp salt
1 cup old-fashioned rolled oats
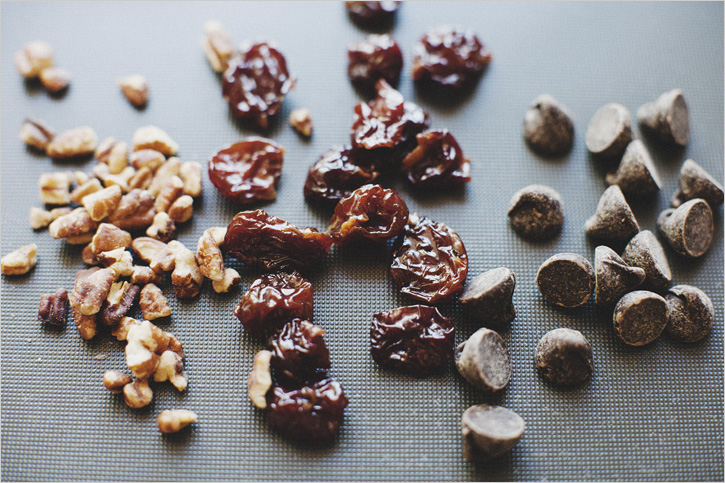
1 cup pecans, toasted and chopped
1/2 cup dried cherries, chopped coarse
5 ounces bittersweet chocolate, chopped into small pieces OR chocolate chips

3/4 cup unsalted butter, softened but still cool
1/2 cup cane sugar
1/2 cup muscavado/ light brown sugar
1 extra large egg
1 egg yolk
1 tsp vanilla extract

Preheat oven to 350°F (175°C)

Use parchment paper or a silpat* to line several standard baking sheets and set aside.

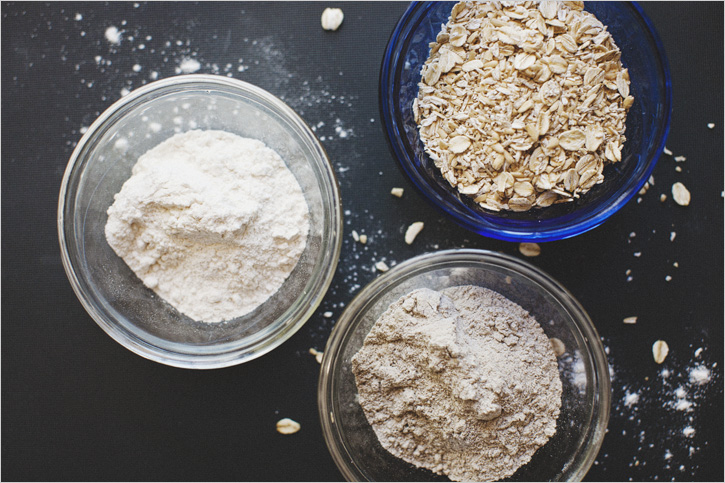
In a bowl, sift together the flours, baking powder, baking soda and salt. Set aside.

In another bowl combine the oats, pecans, dried cherries and chocolate.

In the bowl of a stand mixer or with a whisk and a strong arm, cream together the butter and sugars on medium speed until light and fluffy, scraping down the sides of the bowl as needed. Add the egg, egg yolk and vanilla, and beat until incorporated.

With the mixer down to low, add the flour mixture to the bowl until just combined. Finally incorporate the oats, nuts, fruit and chocolate. Do not overmix. Let the mixture chill for 30 minutes in the fridge.

Roll these portions lightly between your hands in about 3 Tbsp. size portions, then place on each baking sheet, spaced evenly. Wet your hands and lightly press the dough to a 1-inch thickness. Bake the cookies, two trays at a time, in a preheated oven for 9-10 minutes. They should appear slightly undercooked, just let them cool completely.

Remove from the oven and cool on the baking sheets for 5 minutes before transferring to a wire rack.

* You can find a silpat at Bed Bath and Beyond or Amazon. They keep the bottoms on cookies or biscuits from burning, while also creating a non-stick surface. They come in a few sizes, so be sure it fits the measurements of your cookie sheet!

Print This Recipe